
My Ultimate YouTube Studio Setup: Pro Gear + Tips

Prefer to watch?
Here’s the video!
Mentioned in the Video:
*Yup - that’s an affiliate link! My margarita fund thanks you kindly!
Rather read all about it?
So you have big dreams for your YouTube channel, but…
Setting up your space + figuring out what to buy to make your videos look and sound amazing can be a major headache!
If you're like me, you’ve probably thought…
Will someone just give me a list of what to buy and tell me how to set this stuff up properly?!
I know exactly the feeling.
It took me YEARS to perfect my setup. Now, I’m here to share with you:
Every last bit of gear I own.
Some must-know tips on how to arrange your studio space.
Trust me, a few non-gear tweaks can have a huge impact on your video quality too!

Just a heads up: this guide isn’t for those on a tight budget—this is for anyone serious about creating a top-notch YouTube studio with some cash to spare.
I’m going to talk about creating talking head videos (as I usually use this format on my channel) and then I’ll also get into the necessary gear for vlogging on the go.
Let’s start with the gear…
Here are the 12 Essential Items for Your YouTube Studio:
Item#1: Camera

Shout out to Nico (my colleague Helen’s husband + my camera guru!)
After asking a million questions about the kinds of videos I’d be making, he pointed me to this beauty.
Sony A7iv - $2,498
Yes, it’s pricey, but if you’re serious, it’s worth every penny.
Now the camera body is important, but the real magic happens with the lens.
Item #2: Lens
Here’s where you don’t want to skimp. However, you CAN save a little bit off of the cost of Sony lenses if you go with a Sigma like I did.
The lens is what gives you that gorgeous blurry background and stunning video quality.
Also: definitely make sure you are buying a lens that fits your camera!
Item #3: Tripod
Joby Compact Action Tripod - $66
This is an area where I feel like it’s not really neccisary to break your wallet.
I love this tripod because it’s lightweight and perfect for travel.
It’s also super easy to use. I really appreciate how effortless it is to attach and remove the camera to it.
Plus, the fact that it can handle my heavy camera with no problem!

Item #4: Teleprompter

Teleprompter - $149
If you’re doing talking head videos, this thing is a lifesaver.
It saves you time AND money by reducing mistakes and speeding up your editing process.
Trust me, your future self (and video editor) will thank you!
So this is a massively great ROI purchase.
By the way, if you’re wondering who edits my videos- I use the wonderful Justin from Vidpros!
If you’re serious about releasing videos every week, Vidpros might be a good fit.
They give you a dedicated editor for a certain number of hours per week which really helps you be consistent in creating (since if you don’t use those hours, you’re wasting money).
I know this has definitely kept me accountable!
Check them out here for more details.
Item#4: SD Memory Card
SanDisk Extreme PRO 128GB - $25
Whatever camera you choose, an SD card is a must. Now there’s some techy stuff about speed differences, but honestly, this one has worked great for me without breaking my wallet!
Item#5: SD Memory Card Reader
USB-C SD Card Reader - $37
If you’re using a MacBook without an SD slot (like mine), this little gadget is essential.
Just slide in your memory card, plug it into your laptop, and you’re good to go.
Item #6: Extra Batteries and Multi-Charger
Neewer Multi-Battery Charger Pack - $73 and well worth it!
Trust me, you don’t want to run out of battery life mid-shoot.
This multi-charger is a lifesaver, especially if you forget to charge your main battery the night before!
Mine is from Neewer which is a brand that has really solid quality but slightly lower prices than other camera equipment brands.

Item #7: Microphone
Rode VideoMic Pro+ - $299
Okay, so this is the one and only item on the list where I actually recommend you buy something different than what I currently have.
I’m currently using the Rhode Video Mic Pro. The audio quality is great but a major pet peeve of mine is that you have to manually turn it on and off with a little switch on the back.
This leads to me often forgetting to turn it on and therefor, having to redo my recordings.
I also often forget to turn it off when I finish recording which leads to dead batteries the next time I try to shoot.
That’s why I recommend the plus version: It auto-turns on and off with your camera, saving you from the frustration of missed audio.
The sound quality is top-notch, and it attaches easily to a boom arm or directly to your camera.
Let’s talk about where to place your microphone.
So basically the closer you have it to your mouth, the better the audio is going to be. There are a few ways can set this up:
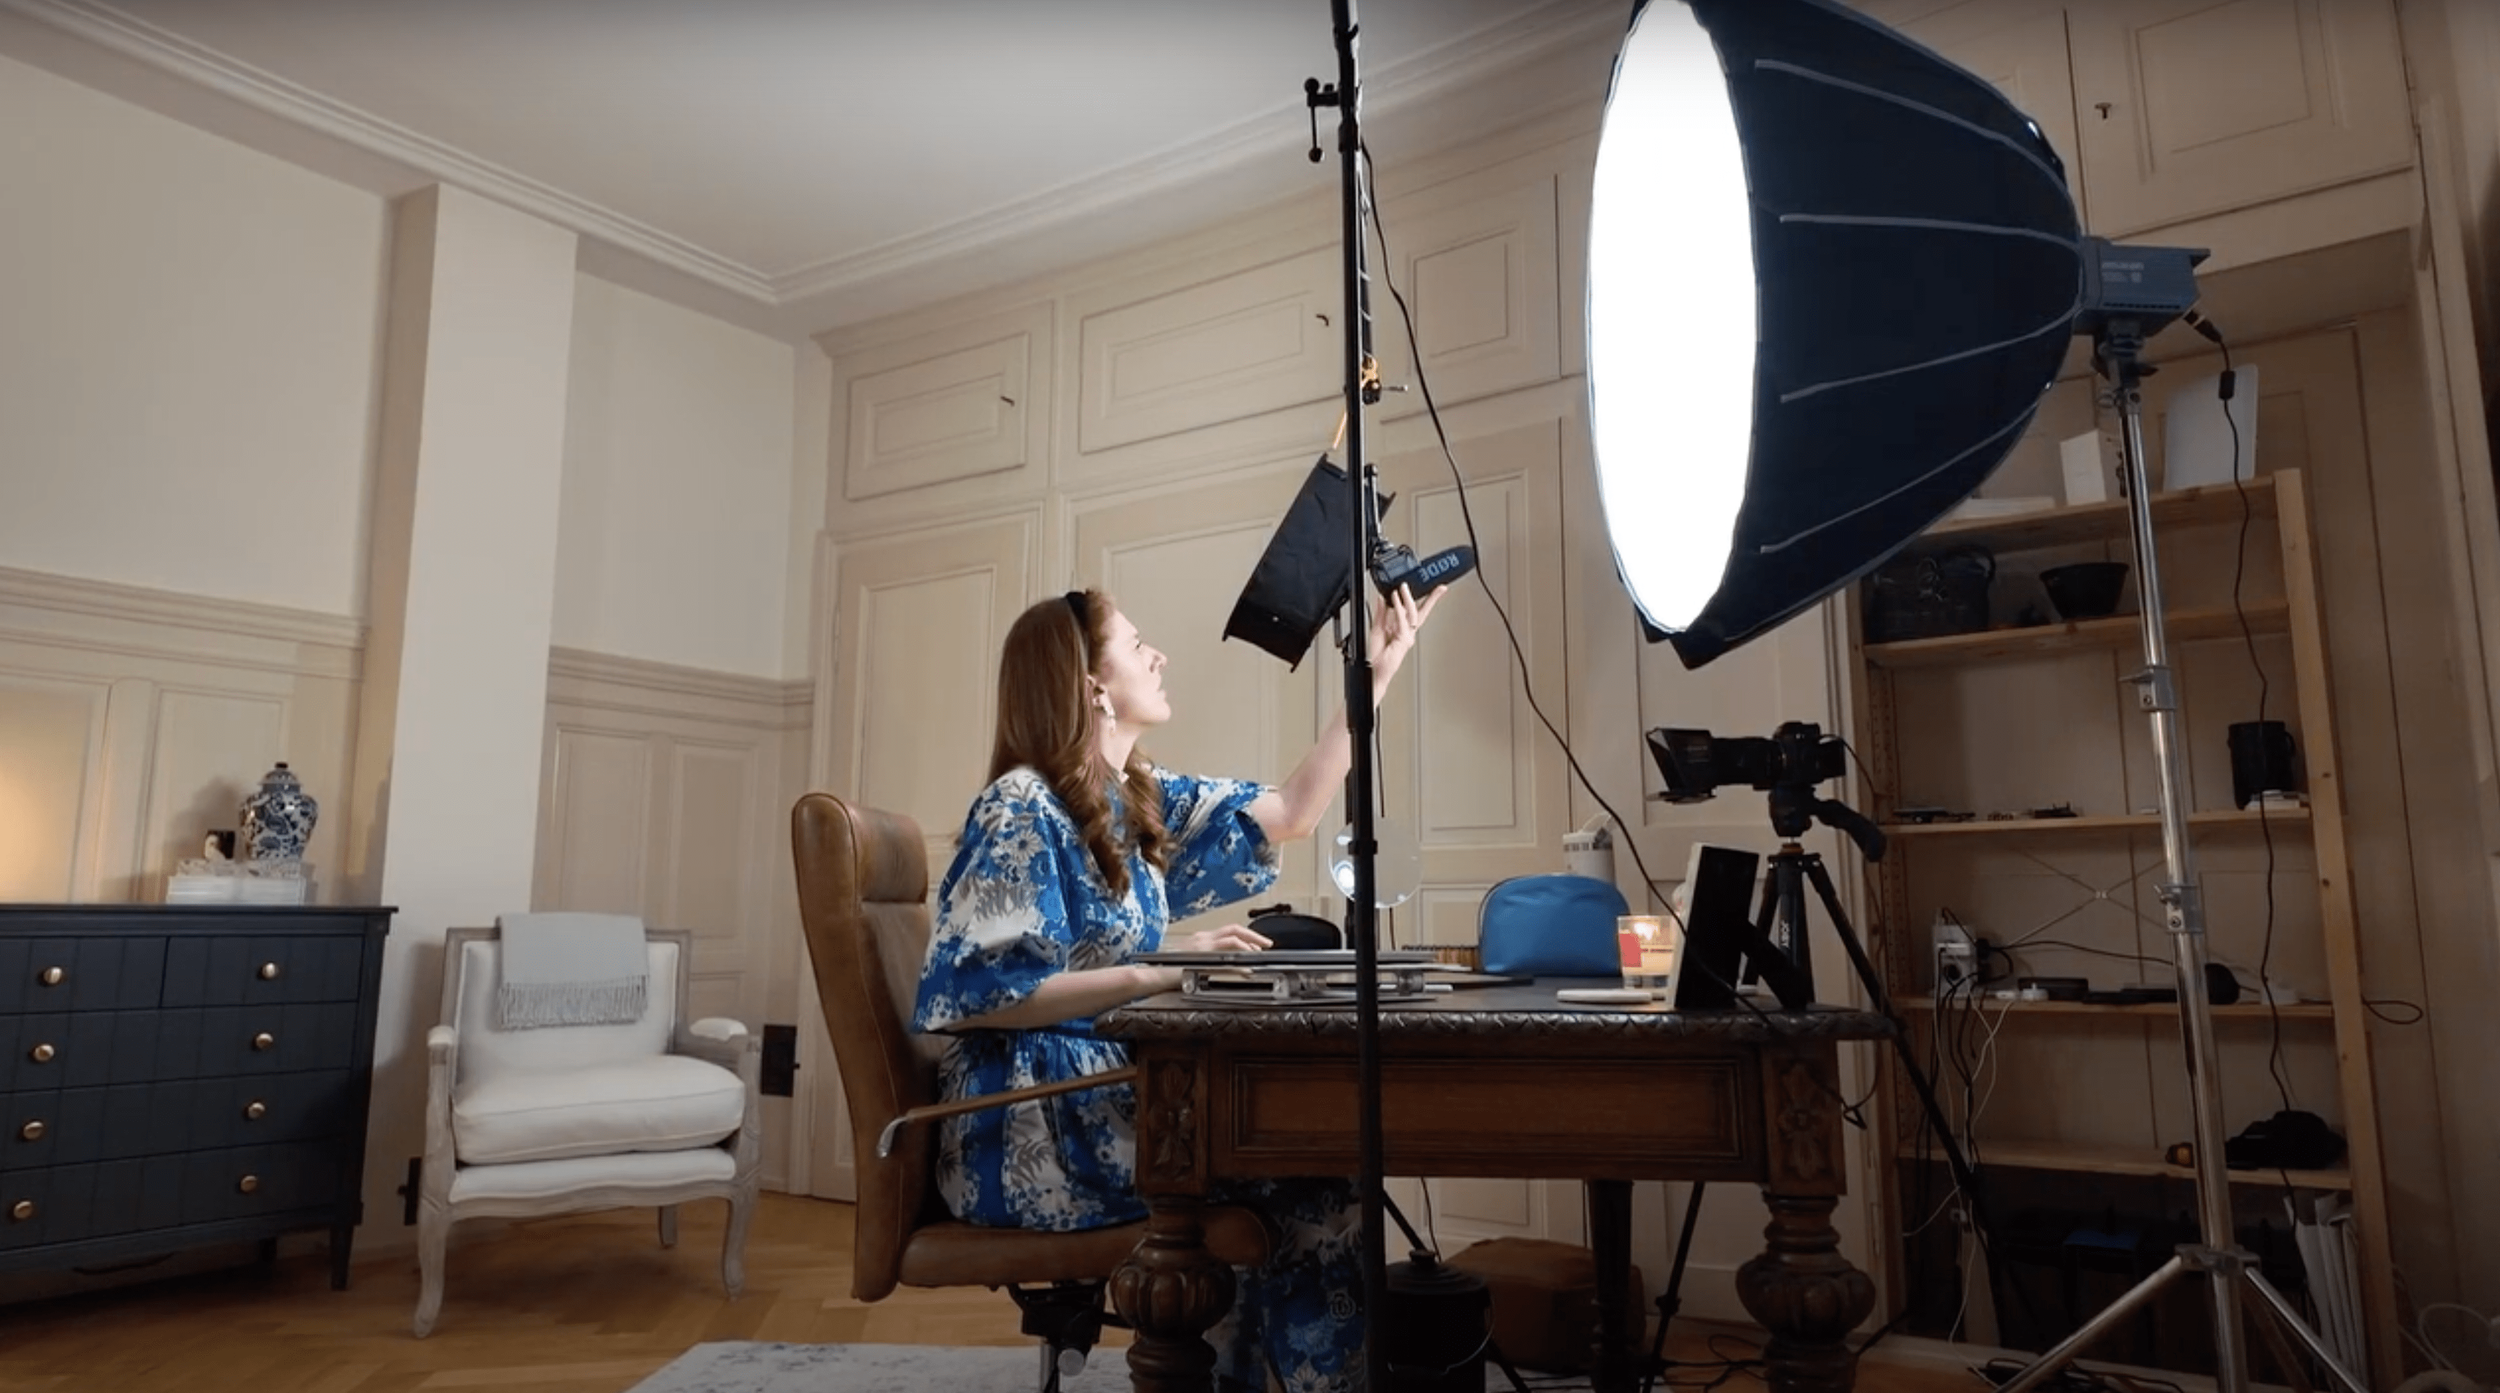
Lots of people attach the mic to a boom arm that’s clamped to their desk.
I have a beautiful, antique desk so this option is not great for me - I wouln’t want to risk breaking the desk with a clamp (also I’m not a huge fan of the mic in shot aesthetic)
The aproach I decided to use is to attach my mic to a standing boom arm instead. You’ll need an extra-long cord if you go for this option!
If you have limited space, you can also just attach your mic directly onto the tripod. This is what i used to do when I lived in London (anyone who has lived there knows that space is not a premium!).

Item #8: Lights & Stands
The best light I have (that I chose after doing a lot of research) is my Amaran:

Amaran 100x S Light - $249
This light is amazing because you can adjust the color temperature to fit your room perfectly.
So you can make the scene warmer, cooler, brighter etc. based on the lighting in the room you are filming in. This is a must-have for creating that professional look.
A dome is essential to accompany the Amaran light and so is a steady stand:
Aputure Light Dome III - $219
But to make professional-looking videos, you don’t want to just have one single light on your face because this will create a strong contrast AKA shadows.

Neewer 2-Pack Dimmable Lights with Softboxes - $240
Here are two more lights that can be used to light up the background as well as create a “hair light” to make you stand out from the background. These two come with their stands as well as softboxes.
Item #9: Reflector


Neewer Reflector - $15
This little guy can really make a big difference.
Mine always sits on my desk under my chin while I shoot and reflects the light back twoards my face. This reduces harsh shadows around the eyes as well as under the chin.
TIP: There are different reflector colors so you have to see which one best fits your needs. This will depend on the temperature of the room you’re shooting in as well as your skin color.
I am quite pale so the gold reflector does me some good- the silver not so much.
Item #10: Multi-Extension Cord
Tessan Multi-Extension Cord with USB Ports - $20
With all these cables, trust me, you’ll need this. It’s also got USB ports for those extra charging needs.
Item #11: Travel Gear Bag
Those who regularly read my blogs know that I go home to Canada every summer and I actually keep working and filming while I’m there.
To do so, I bring a camera bag with me.
I absolutely love my current camera bag for the following reason: it really doesn’t look like a camera bag.

Kamrette Lyra Backpack - $229
This cute yet functional camera gear bag is perfect for travel. It fits everything you need and doesn’t scream “camera bag.”
Item #12: On-the-Go Camera
Okay so although I LOVE my Sony, it’s kinda a pain to bring with me when i’m shooting vlogs outside of the house.
I updated my iPhone to the 14 Pro last year and tried out using that for my vlogging needs.
The result?
Although the quality was amazing, there were a few hang-ups to using it as my only vlogging camera:
It didn’t always shoot the smoothest shots.
It was kinda inconvenient when I was shooting but needed to use my phone at same time (for example, shooting while driving but then needing google maps).
So basically, although phones have amazing quality now, there are some drawbacks.

So I’ve started shooting with the DJI Osmo Pocket 3 and I have to say… it’s well worth all the rave!
The quality is amazing and the fact that it’s so tiny makes it so comfortable to carry around on the go.
Also the built-in gimble means that the shots are super smooth!
Here’s the model I got:
Micro SD card - $29
That’s all of my gear with a grand total of $5,963.
I honestly didn’t know how much i’d spent on all of this until I started writing this blog post. 😅
So clearly this studio set up is not a cheap endeavor but I will say this:
At the beginning of my YouTube career, I actually spent a lot of money on cheaper, more basic lighting and camera gear. In the end, I ended up replacing all of it.
So I actually would have saved a lot of money if I had chosen to go straight for the good stuff.
My 6 Home Studio Set-up Tips:
Now that we’ve covered the gear, let’s talk about how to set up your room for the best possible video quality.
These tips are cost-free but can make a world of difference in how your videos turn out.
1. Block Out All External Light
Natural light is inconsistent.
A cloud passes by, and suddenly the lighting in your room changes, making it more work for your video editor to correct.

I’m planning to get thick blackout curtains for this reason. Until then, I close the shutters. If you don’t have shutters or thick curtains, you can tape a black garbage bag behind a curtain to block out light while keeping your space looking neat (this is what I used to do when I lived in London).
If you CAN’T block out the light from the windows, then be sure to face twoards the window. If the light is behind you, you will look too dark, and if it’s at your side, your face will end up being unevenly lit and contrasty.
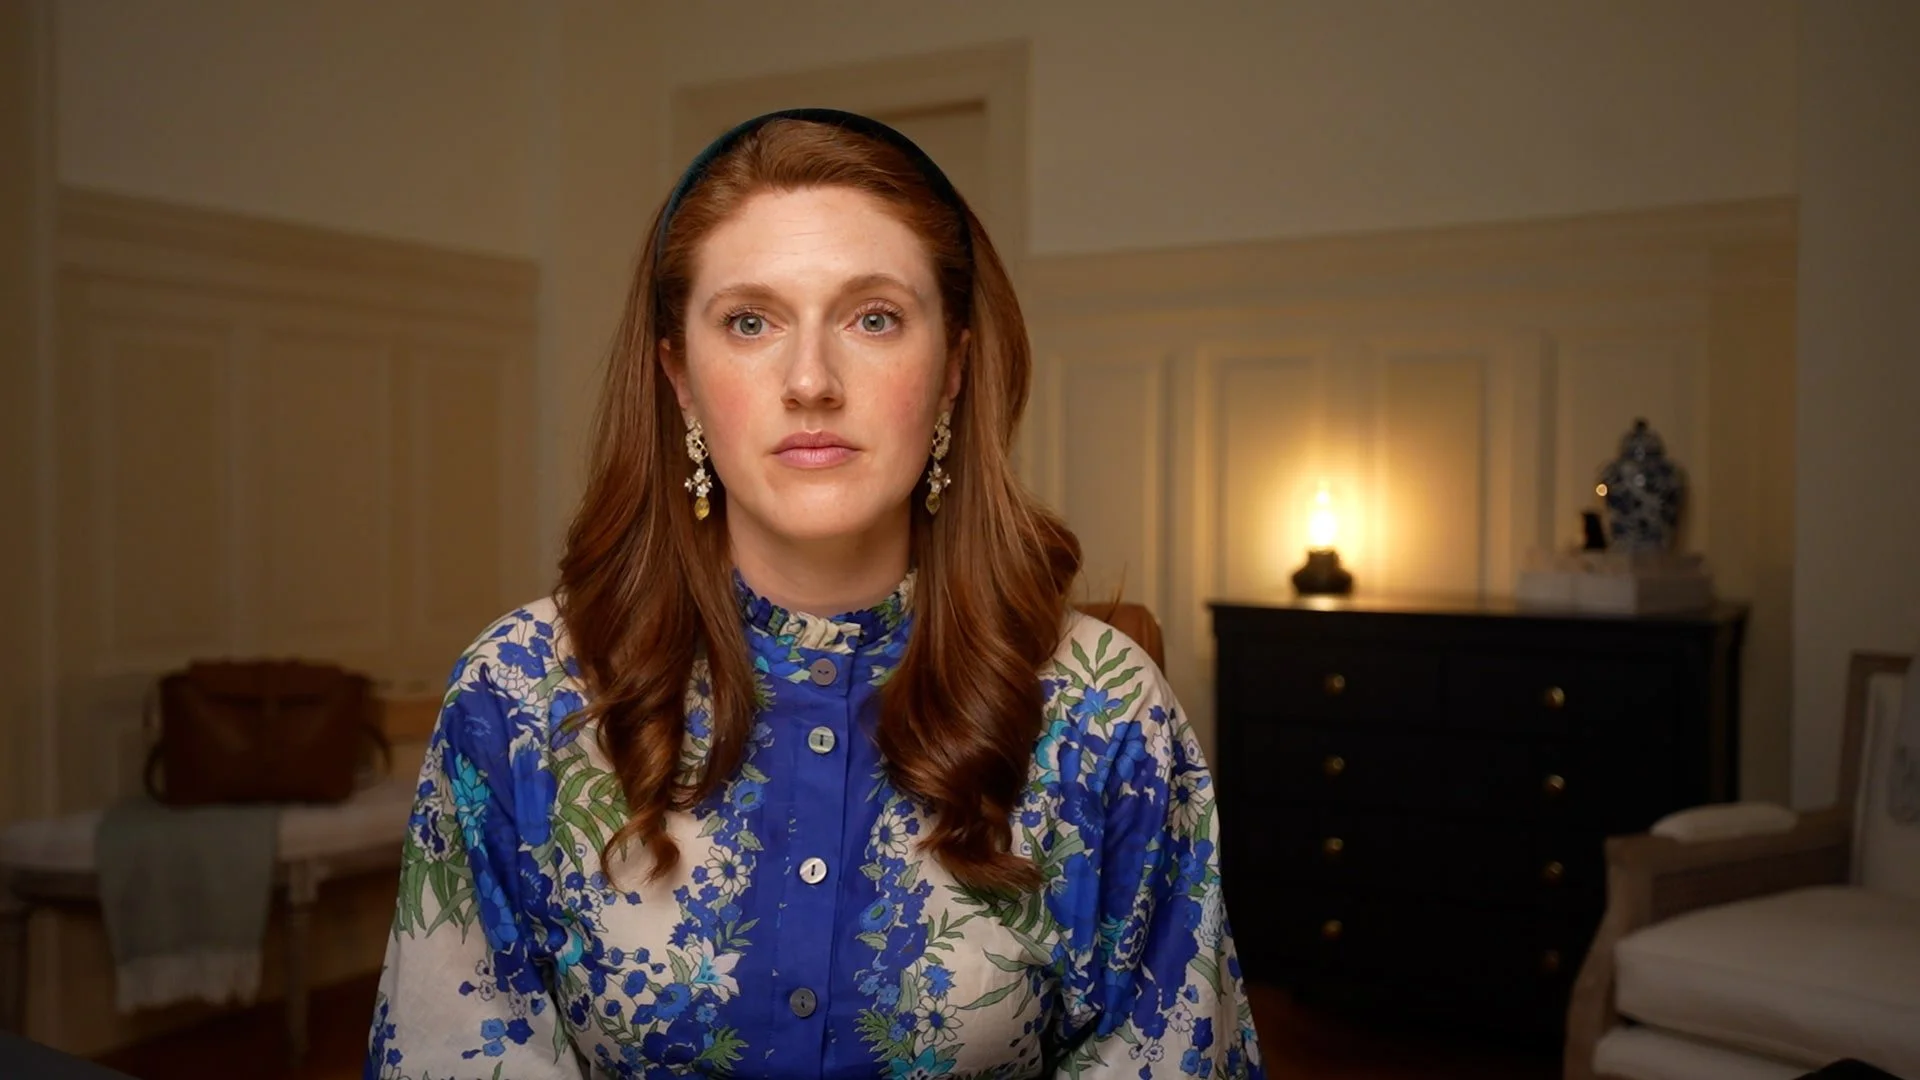
2. Create Space Between You and the Background
Leaving some distance between yourself and the background wall not only looks nicer but also helps to achieve that beautiful background blur if you’re using a lens like mine. Plus, it prevents shadows behind you (when your background is properly lit that is- but we’ll get to that in a sec!).
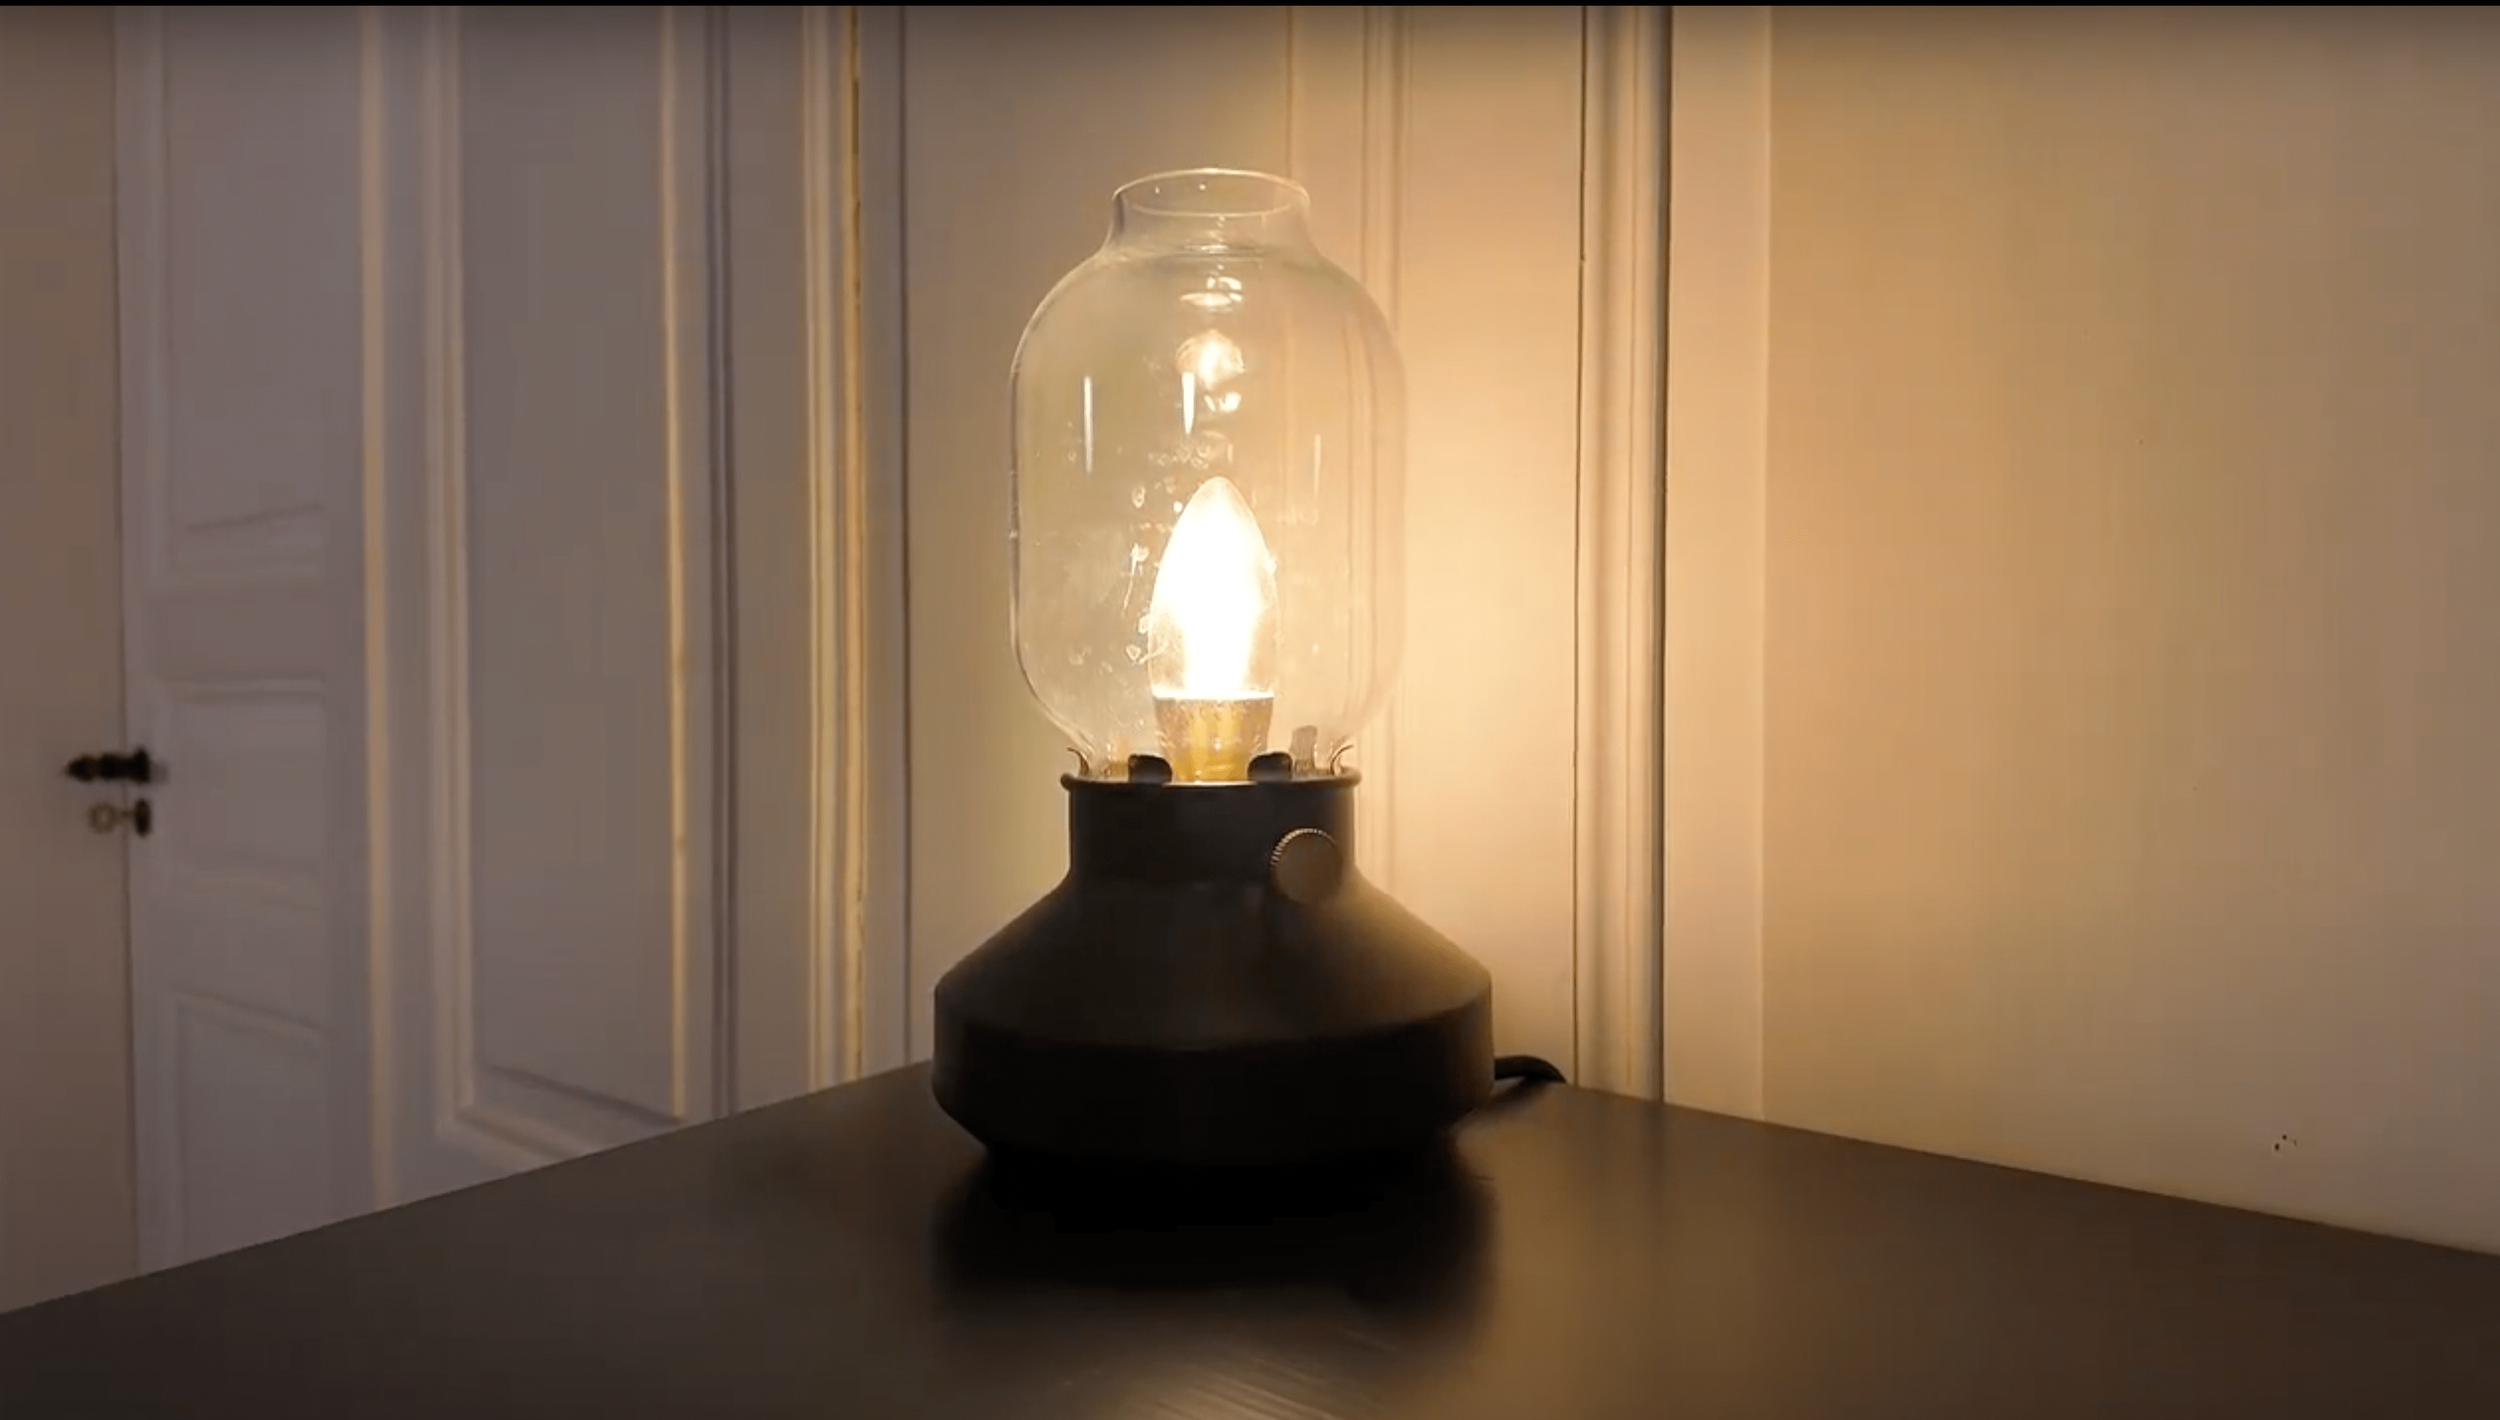
3. Add a Practical Light
A practical light in the background can make a huge difference in your video’s appearance.
It doesn’t have to be fancy—just a simple lamp can do the trick. My lamp was only $29 from Ikea (and available on Amazon too!).
Check out how much of a difference having this light on in the background makes…

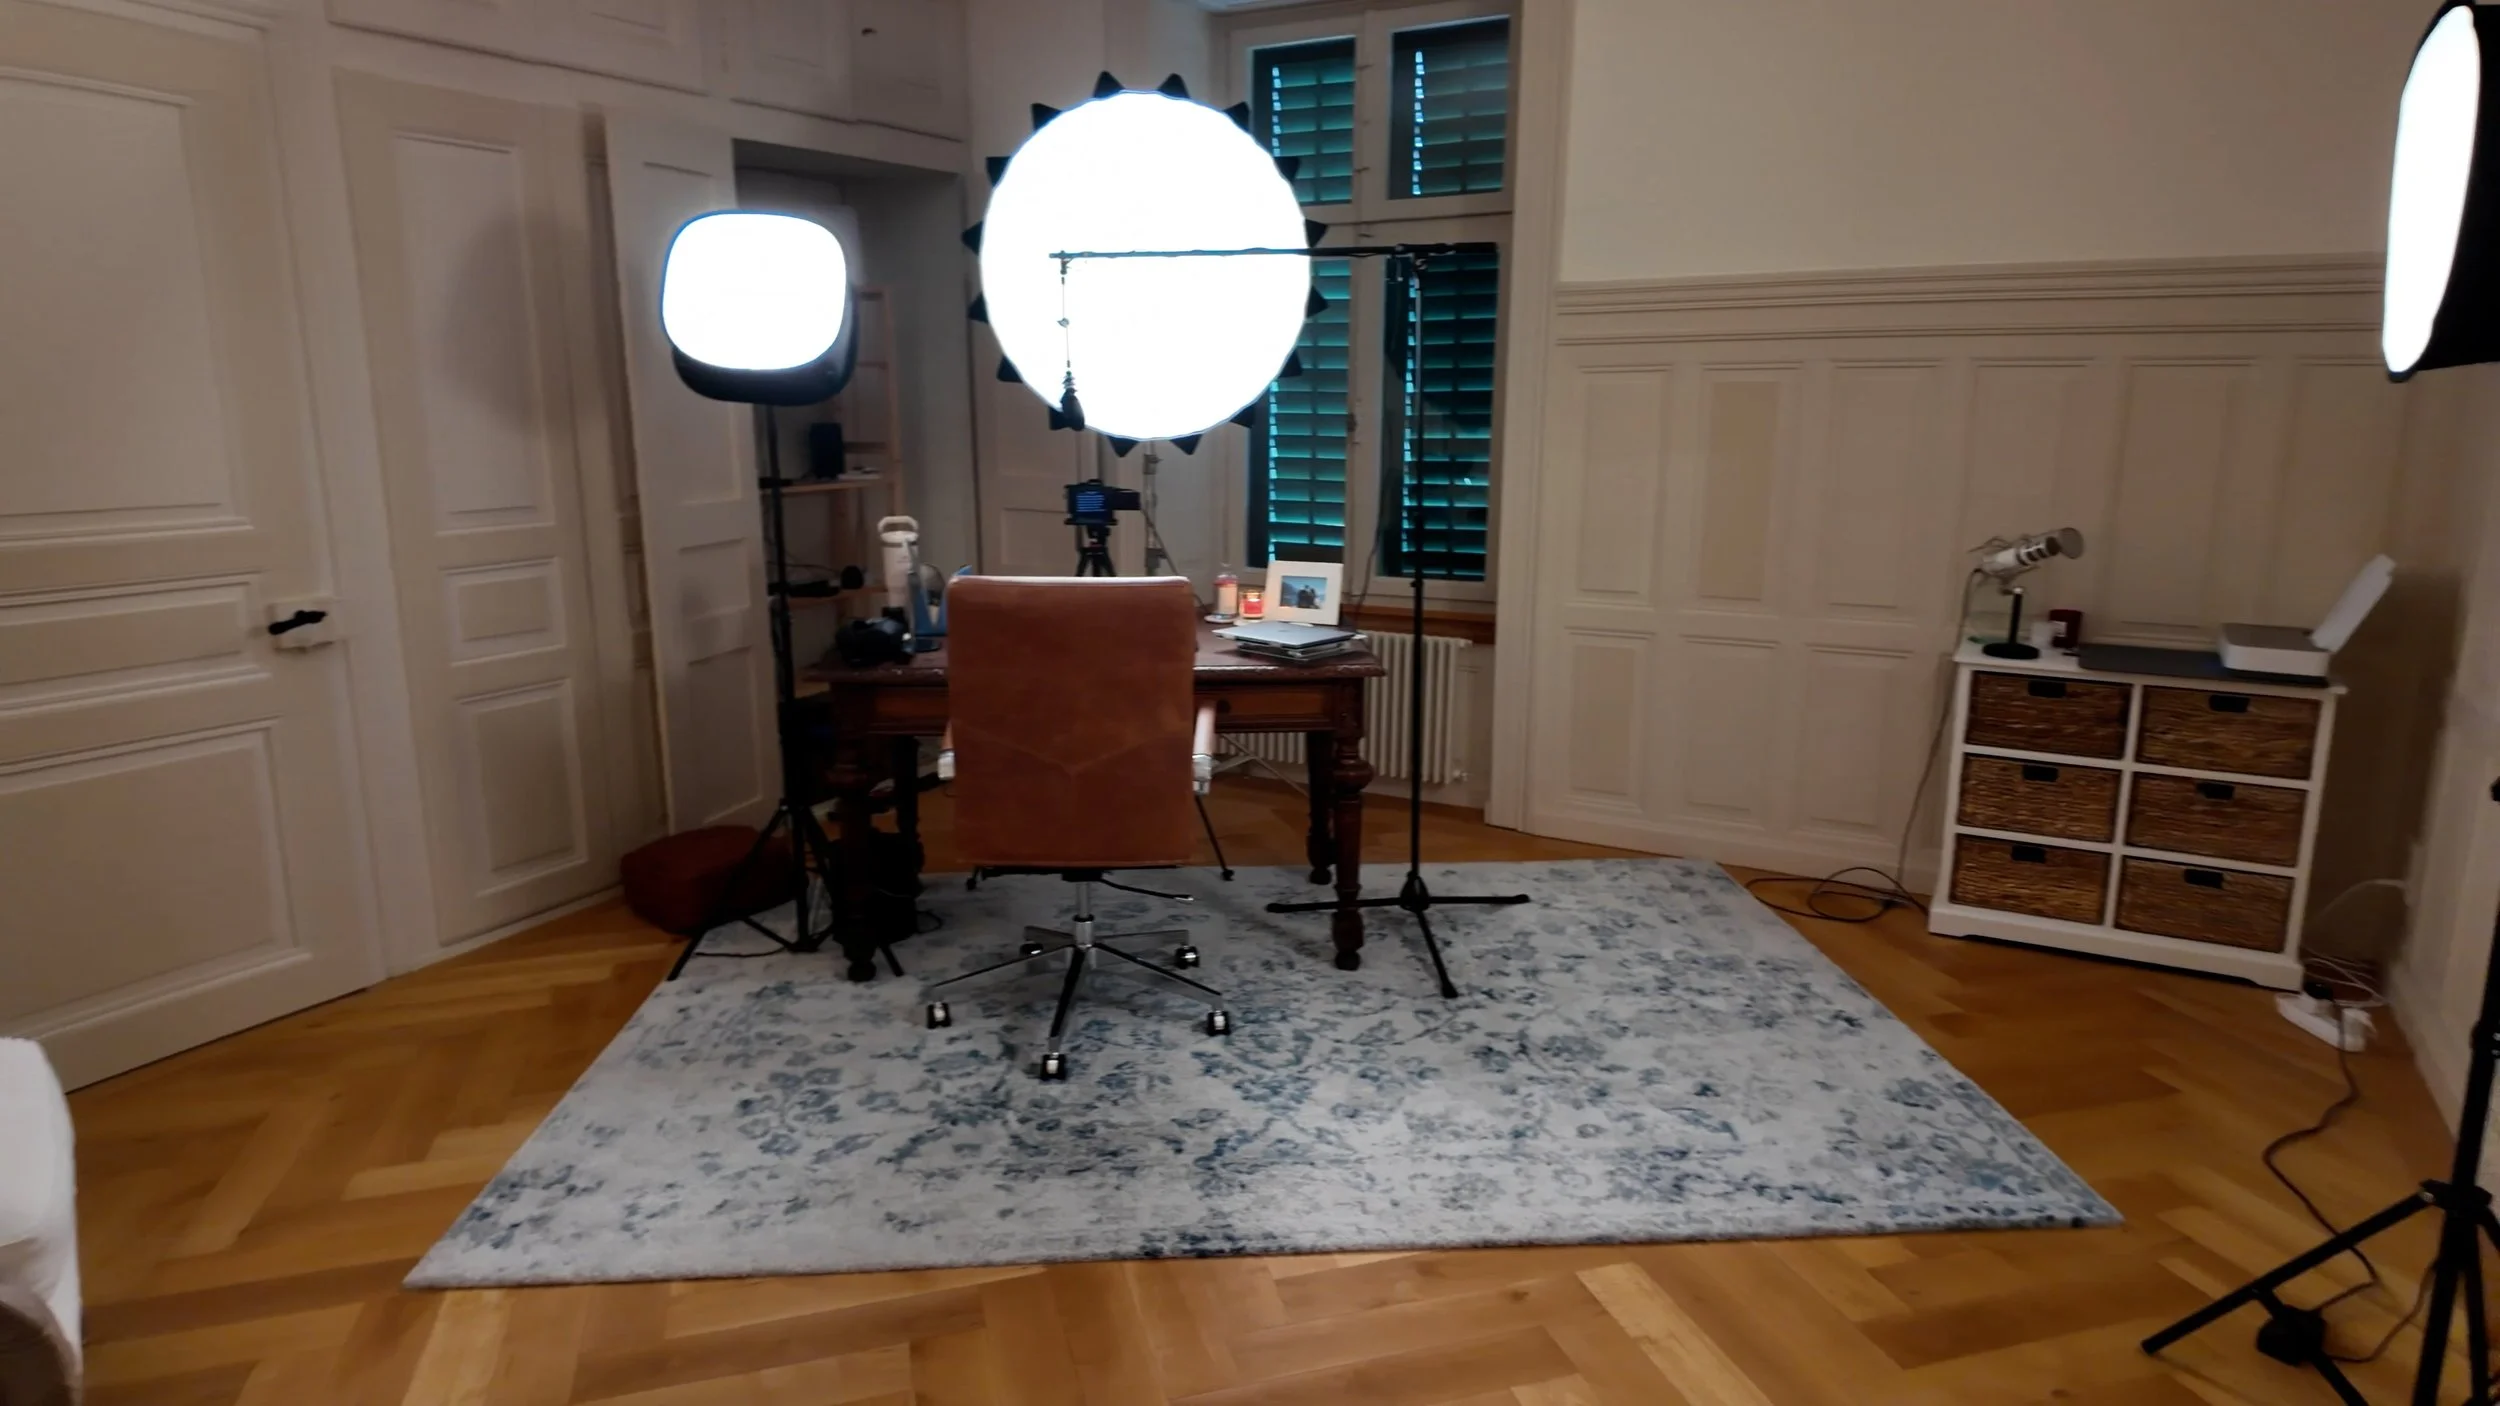
4. Positioning Your Lights
This can be a bit complex, so I created a handy PDF that includes a cheat sheet that shows exactly where to place your lights, along with a list of all the links to the items I mentioned above. That way if you don’t want to buy them all today, you’ll have them all in one place to reference in the future. 👇

So in a nutshell:
Place one light on your face (I use the Amaran 100x S).
Use a second light to illuminate the background behind you.
Add a "hair light" pointing to the side/back of your head to increase contrast and separation from the background.
5. Contrast Between Your Outfit and Background
Avoid wearing the same color as your background. Contrasting colors look better on camera and help you stand out
In my home studio, I avoid wearing beige and white clothing because my walls are white.
6. Choose On-Brand Decor
Shelves behind you can create strange shadows, so opt for something on-brand that doesn’t create weird lighting effects.
I’m about to redecorate my office, so my background will get a whole lot prettier soon. Stay tuned for a blog post on that process!
If you’ve made it this far, good work!
Now, I’ve got two goodies for you!
#1: My Youtube Studio Gear Guide:
Get the full breakdown of my gear and tips on where to place your lights. It’s free !
#2: My 2024 Youtube Growth Strategy:
Gear is essential, but strategy is also key.
In this video, I spill the beans on my YouTube growth strategy for the year.
Check it out next to make sure you have a winning plan to go with all that fancy new equipment!